[Troubleshooting] Inspect Logs, Roblox Creator & Game Pass Issues
In the ever-evolving landscape of digital creation, have you ever wondered how a simple idea transforms into a fully realized, interactive experience? The answer lies in the intricate ecosystem of platforms like Roblox, where the tools for creation are constantly being refined, empowering creators to build, share, and monetize their visions.
The following text provides insights into the mechanics of creation, specifically within the Roblox environment, and sheds light on the methods for asset management, user engagement, and the nuances of game development.
The underlying architecture of the Roblox platform treats nearly everything as a cloud-based asset, each possessing a unique identifier. These identifiers, typically in the format `rbxassetid://[id]`, are employed across various objects as attributes, aligning with the requirements of specific asset types. Upon the release of an experience, the experience itself is assigned a `universeId`, while each individual location receives a `placeId`.
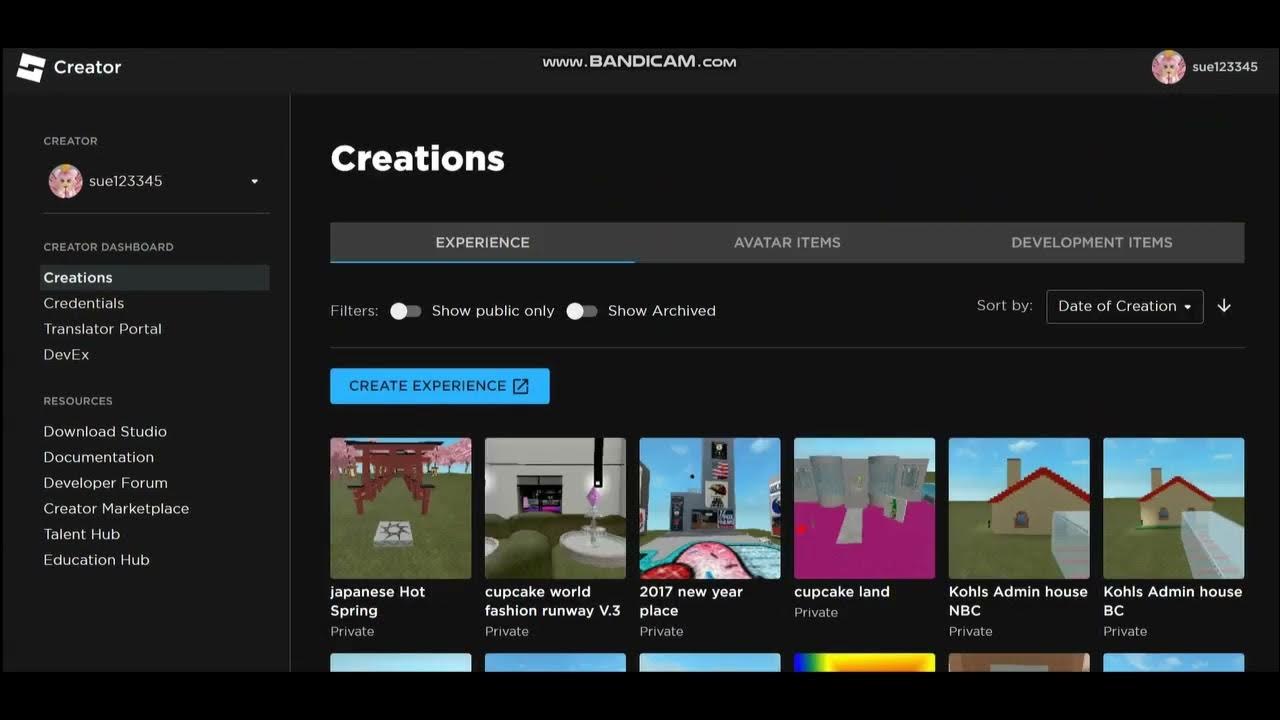
Roblox is committed to continually improving the experience for its creator community, as evidenced by the announcement of new features in the creator dashboard. Badges are the latest addition, streamlining the management of assets. This marks a shift in the direction of the creator dashboard, making it the focal point for creators to manage all of their assets.
With this new functionality, the creator dashboard becomes a versatile hub for managing badges for all experiences. The dashboard's accessibility extends to any device, providing the convenience of on-the-go badge management.
Creating a Game Pass is as Easy as 1, 2, 3:
- King Von Alive Lil Durks Shocking Revelation Leaked Footage
- Aditya Roy Kapurs Family Unveiling His Roots Lineage
- Navigate to the Roblox creation page.
- Go to the 'Game Passes' section under the 'Store' tab.
- Click 'Add Pass' to begin the creation process.
Roblox is a dynamic platform, providing creators with the ability to transform their imaginings into reality. With everything needed to start building available free of charge, creators are empowered to join a global community and publish instantly to the world. The Creator Hub provides the tools and resources to assist in learning, managing, and growing content.
The dashboard serves as a central point for managing and operating experiences.
Passes, a key component of experience monetization, are free to create. Creators then have the ability to set the price in Robux. The experience passes documentation provides thorough details on creation and implementation.
Creating a game pass within the Roblox ecosystem involves several steps:
- Enter the creator dashboard on the Roblox website.
- Select the game to create a pass for, and then select associated items.
- This action will bring up a list of existing passes.
- To create a new pass, simply select the 'Create a Pass' button.
- Click on 'Create New Pass' and fill in the following required details:
- Upload an image, such as a logo or icon.
- Give your game pass a short, descriptive name. For instance, you could use "Donate 10 Robux" or "Support Me."
Roblox is built to support creators in every step of the process, from creation to scaling and monetization.
While Roblox does not directly record the purchase history of developer products for specific users, it is possible to request sales data downloads. If user-specific purchase history tracking is required, developers are responsible for storing this data.
Begin your development journey by creating your first experience: recreating an experience that launches projectiles at floating platforms. Learn the basic concepts and how to apply them.
To create your first avatar character, learn how to utilize Blender and Roblox's downloadable template models.
Creating and configuring content within the creator dashboard is a straightforward process. Select the game you want to create a pass for, then find associated items. Within associated items, you can then view a list of passes created for the game. To create a new pass, just press the create a pass button.
Tutorials and overviews are available to guide users through the creation process using the creator dashboard, providing guidance on tasks developers can complete. The goal is to make the creation of game passes, as well as other aspects of development, streamlined and accessible.
Roblox's aim is to enable the creation of anything, anywhere, by anyone, which is especially pertinent for developers and creators. The company offers everything needed to create, scale, and monetize.
Recent additions to the creator dashboard are the focus of a public beta for games. Clicking on a game tile will lead you to the overview page, displaying a small amount of information.
To achieve this, it's important to define your objectives clearly and simply. An example is the desire to create a game pass for a game in which you have team create access, but do not own. The ability to make a game pass for a game you do not own can be achieved by using the creator dashboard.
Roblox provides team create permissions so the user can edit the game.
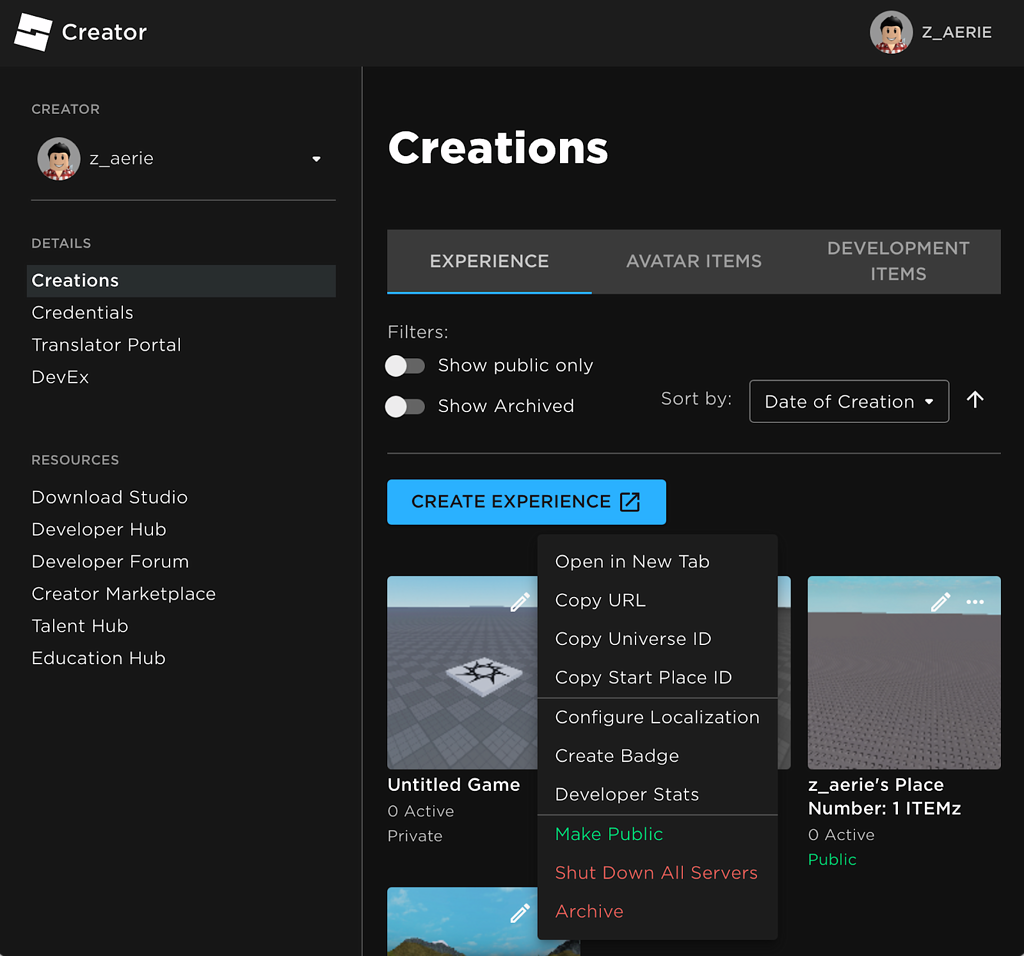
The recent addition of a new feature within the creator dashboard enables you to configure existing game badges. By navigating to a specific game and selecting its "associated items" side navigation link, you can access the new configuration page. On the associated items badges tab, you can then click on individual badges to be taken to the badge overview.
| Feature | Details |
|---|---|
| Creator Dashboard | The primary interface for managing assets, including badges and game passes. Provides tools for learning, managing, and growing content. |
| Game Passes | In-game items that players can purchase, allowing developers to monetize their experiences. |
| Badges | Achievements earned by players for completing specific actions within an experience, encouraging player engagement. |
| Robux | The virtual currency used on the Roblox platform, earned by developers through in-game sales. |
| Associated Items | A section within the creator dashboard where creators manage items such as badges, passes, and other related assets for a specific game. |
| Team Create | A feature that allows multiple developers to collaborate and edit a game simultaneously. |
| Blender | A free and open-source 3D creation suite that can be used to create custom avatar characters and other assets for Roblox. |
| Universe ID | A unique identifier assigned to an entire Roblox experience (game). |
| Place ID | A unique identifier assigned to each individual location within a Roblox experience. |
| rbxassetid | Identifier used to identify and reference assets (like textures, meshes, etc.) within Roblox. |
Here's a table summarizing key information about the Roblox Creator Dashboard and related concepts.
This table should provide a comprehensive overview of the key features and concepts discussed, ensuring that creators can efficiently manage their assets and effectively develop their games within the Roblox ecosystem.
To further enhance the user's understanding and ability to utilize the platform efficiently, the following table lists the steps involved in creating and managing game passes within the Roblox creator dashboard.
| Step | Action | Details |
|---|---|---|
| 1 | Access the Creator Dashboard | Log in to your Roblox account and navigate to the Creator Dashboard. |
| 2 | Select Your Game | Choose the specific game for which you want to create a game pass. |
| 3 | Navigate to "Associated Items" | Click on the "Associated Items" link to manage in-game assets like passes and badges. |
| 4 | Go to "Passes" | Find the "Passes" section within the "Associated Items" menu. |
| 5 | Initiate Pass Creation | Click on the "Create a Pass" button. |
| 6 | Upload an Image | Upload a unique image to represent the game pass (e.g., a logo or icon). |
| 7 | Name Your Pass | Give your game pass a concise and descriptive name (e.g., "Donate 10 Robux"). |
| 8 | Add a Description (Optional) | Provide a description of the game pass and its benefits. |
| 9 | Configure Sales | Navigate to the sales tab and set the desired price of the game pass in Robux. |
| 10 | Save and Publish | Save the game pass, and if enabled, it will be immediately available for sale within your game. |
This step-by-step guide provides a clear path for creators to leverage game passes, thereby facilitating monetization and user engagement within their Roblox experiences.
The information above is to help you with the creation process, the basic steps to creating a game pass, how to navigate the Roblox Creator Dashboard, and how to use it to maximize the user experience.
With these instructions, creating a game pass in Roblox is accessible to both experienced developers and new creators who want to take their game to the next level.
In the vibrant world of Roblox, where imagination meets technology, the creator dashboard stands as a testament to the platform's commitment to empowering creators. The emphasis on user-friendly interfaces, streamlined asset management, and readily available resources demonstrates Roblox's understanding of the evolving needs of developers. From creating basic game passes to designing complex interactive experiences, the platform has provided the tools and the community needed for creators to succeed.

Detail Author:
- Name : Corrine Berge
- Username : mylene.gerhold
- Email : magnus65@schimmel.com
- Birthdate : 1996-06-19
- Address : 758 Bosco Forks Edisonburgh, AZ 04157
- Phone : 707.447.7090
- Company : West and Sons
- Job : Arbitrator
- Bio : Veritatis minima quis consequatur. Voluptates adipisci rerum dolores est. Atque perferendis voluptatibus sunt odit blanditiis iusto.
Socials
tiktok:
- url : https://tiktok.com/@gleasonc
- username : gleasonc
- bio : Facere eum quaerat fugit voluptatem.
- followers : 5343
- following : 1318
facebook:
- url : https://facebook.com/cgleason
- username : cgleason
- bio : Sequi debitis quod sapiente at nam.
- followers : 1266
- following : 1108
linkedin:
- url : https://linkedin.com/in/citlalli6672
- username : citlalli6672
- bio : Eum soluta reiciendis tempore voluptatem laborum.
- followers : 2345
- following : 1642
